This guide will explain Remote Configuration and how it can empower ISPs to help more customers in less time, thus, preventing the need to perform emergency truck rolls to a customer's home. Reminder: the network will automatically be set up under the ISP Owners email. If you want your customer to have permission to manage the network, you will need to add their e-mail to the Subscriber App Account field. You can find more information here.
What is remote configuration?
Remote Configuration allows an ISP to remotely configure a Vilo network from the ISP Web Portal prior to or after deployment to a customer's home. Once the Vilo has been configured, it can be installed remotely. However, Vilo will need to be plugged in and connected to the modem via the WAN port. This can be done entirely from the ISP Web Portal, excluding the need for the app
Please note: the Vilo app is still needed to scan units into inventory or to assign a network to a customer.
Requirements for remote configuration:
- Ensure the Vilo has been added to your inventory using the Vilo app by going to Account -> Scan Vilos.
- The Vilo must be connected to WAN and power.
- The Firmware on the Vilo must be V. 5.16.0.195 or higher.
- Remote configuration only works with internet that is set up for DHCP (No static IP or PPPoE)
How to configure Vilos for Remote Configuration:
Please make sure the requirements mentioned above have been met before completing the next steps.
- Log into the ISP Web Portal
-
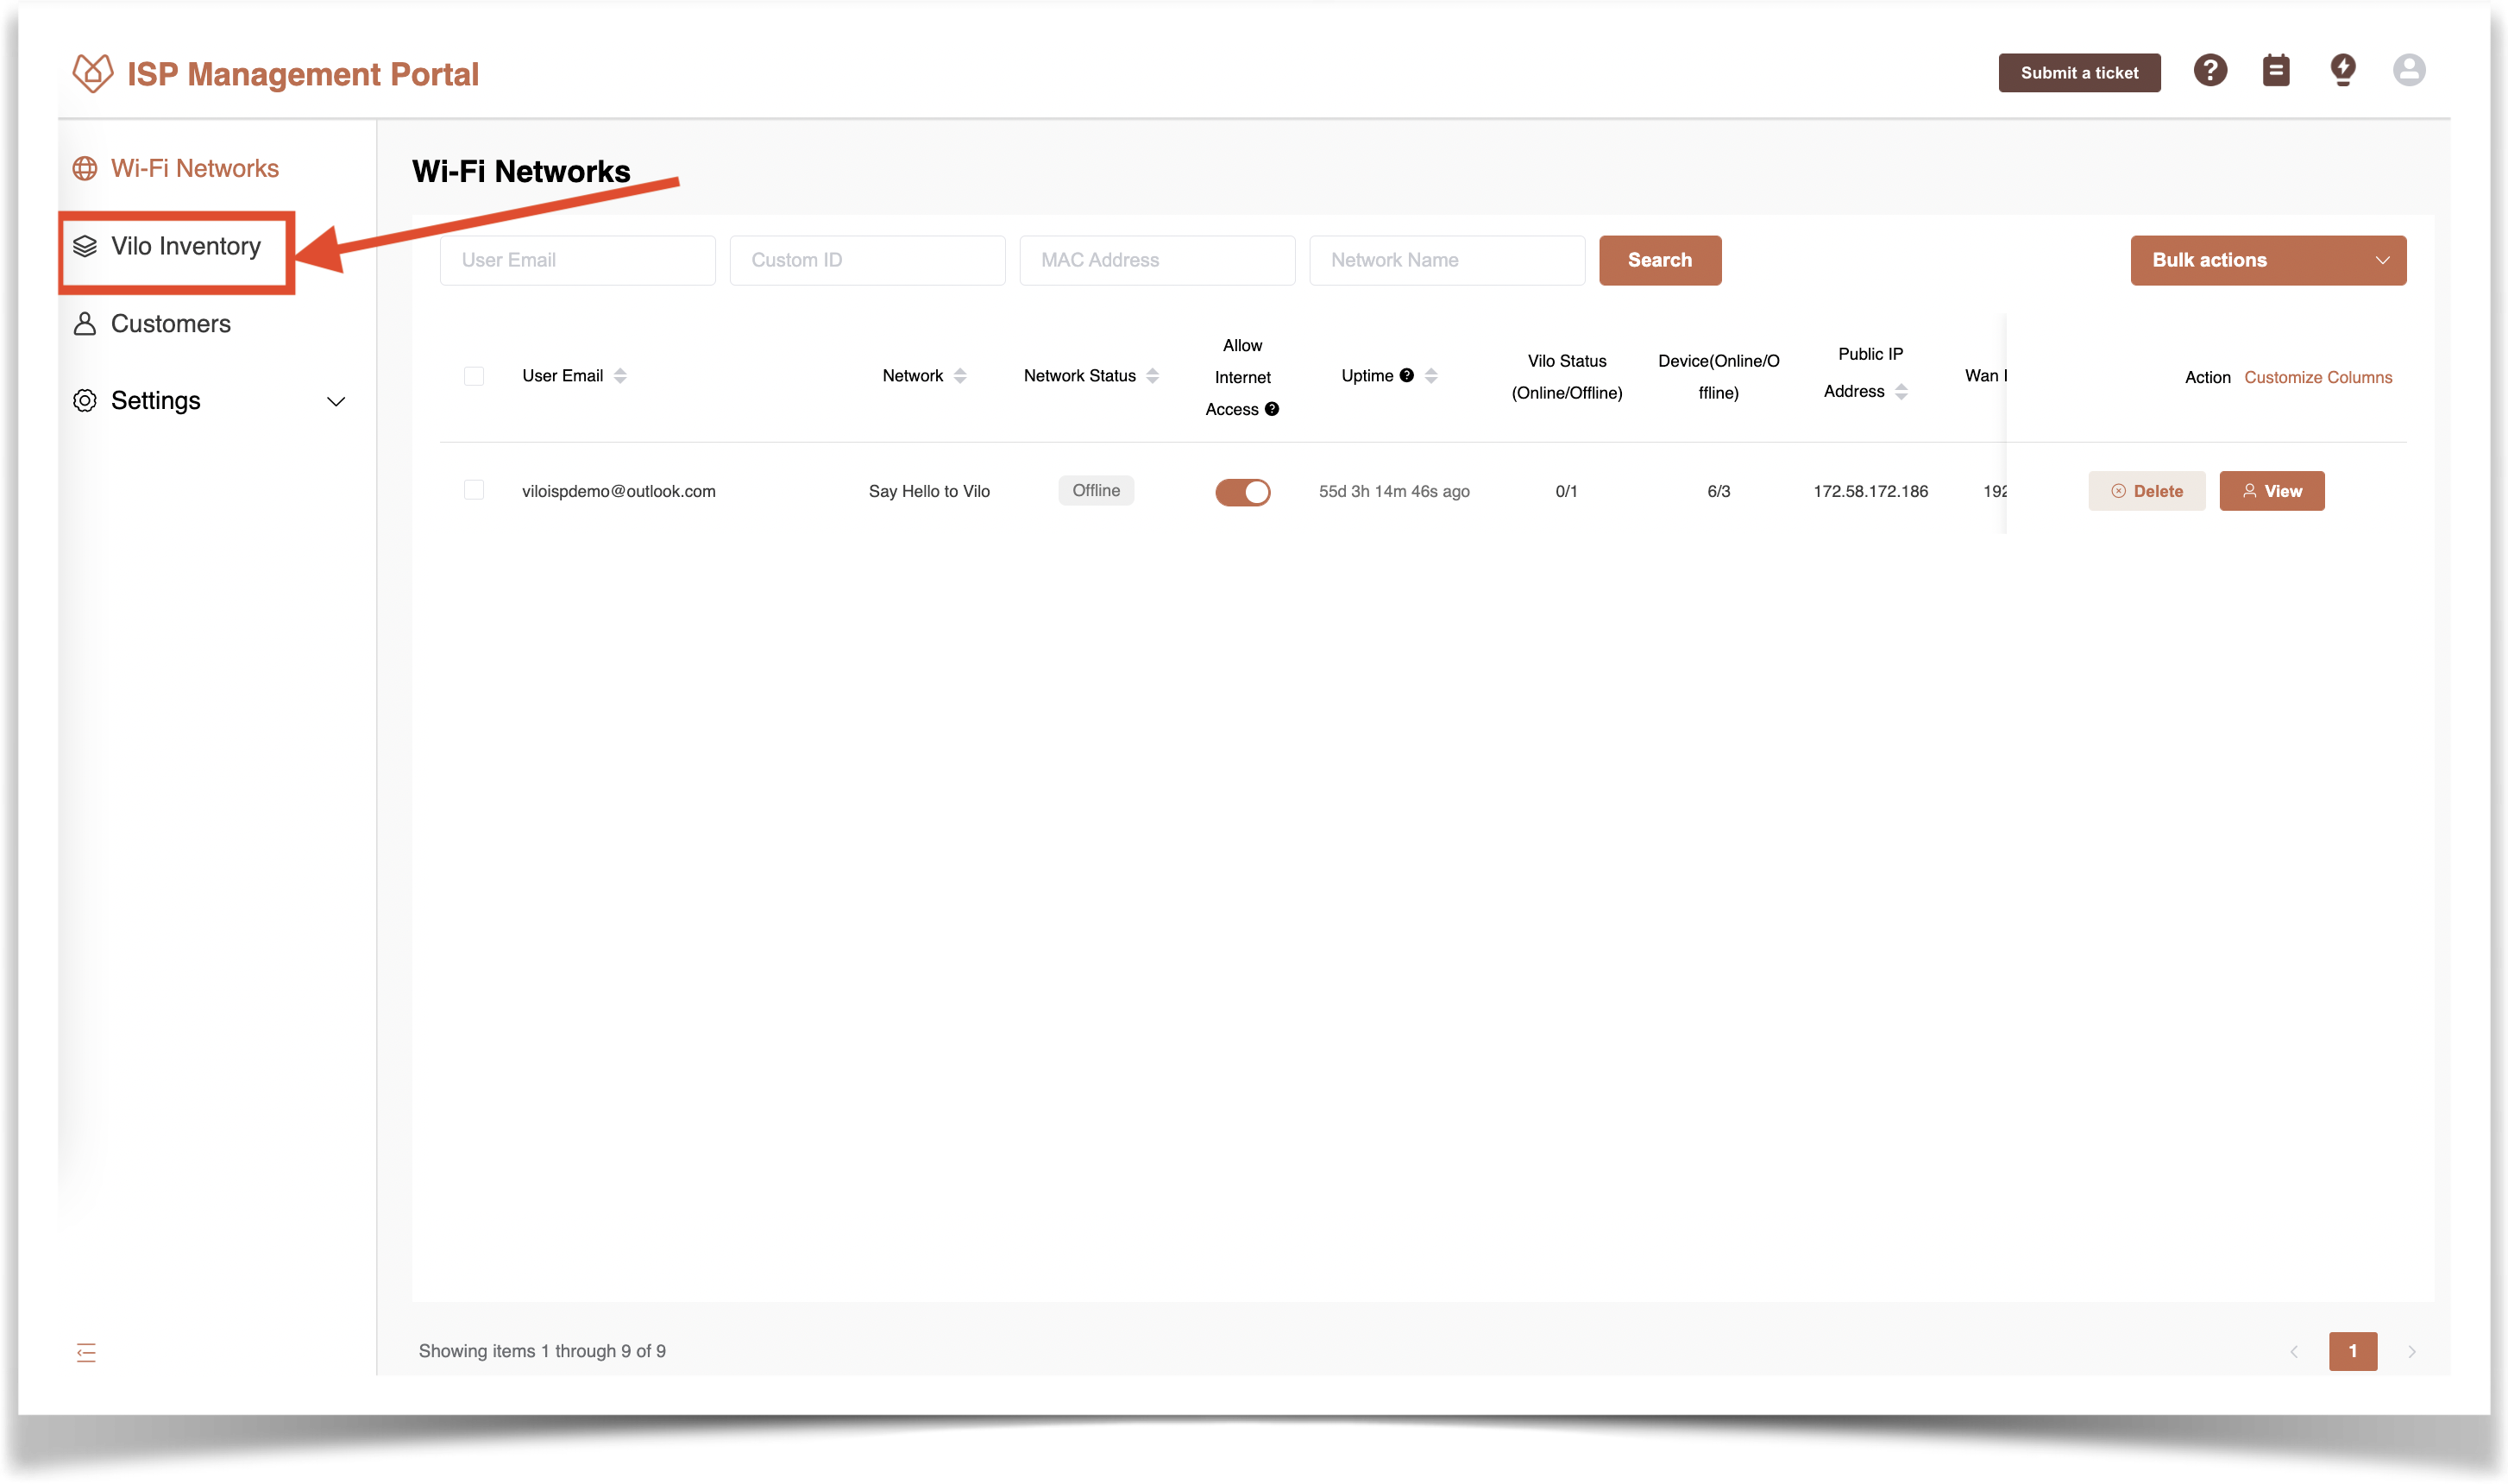
Select the Vilo Inventory page on the left-hand side
- Look for the "Remote Configuration" column. If you do not see it, you may need to use the “Customize Columns” menu to unhide it. You will then see "Configure" next to the Vilo you'd like to set up for remote installation. If this option is greyed out, the firmware is not up to date.
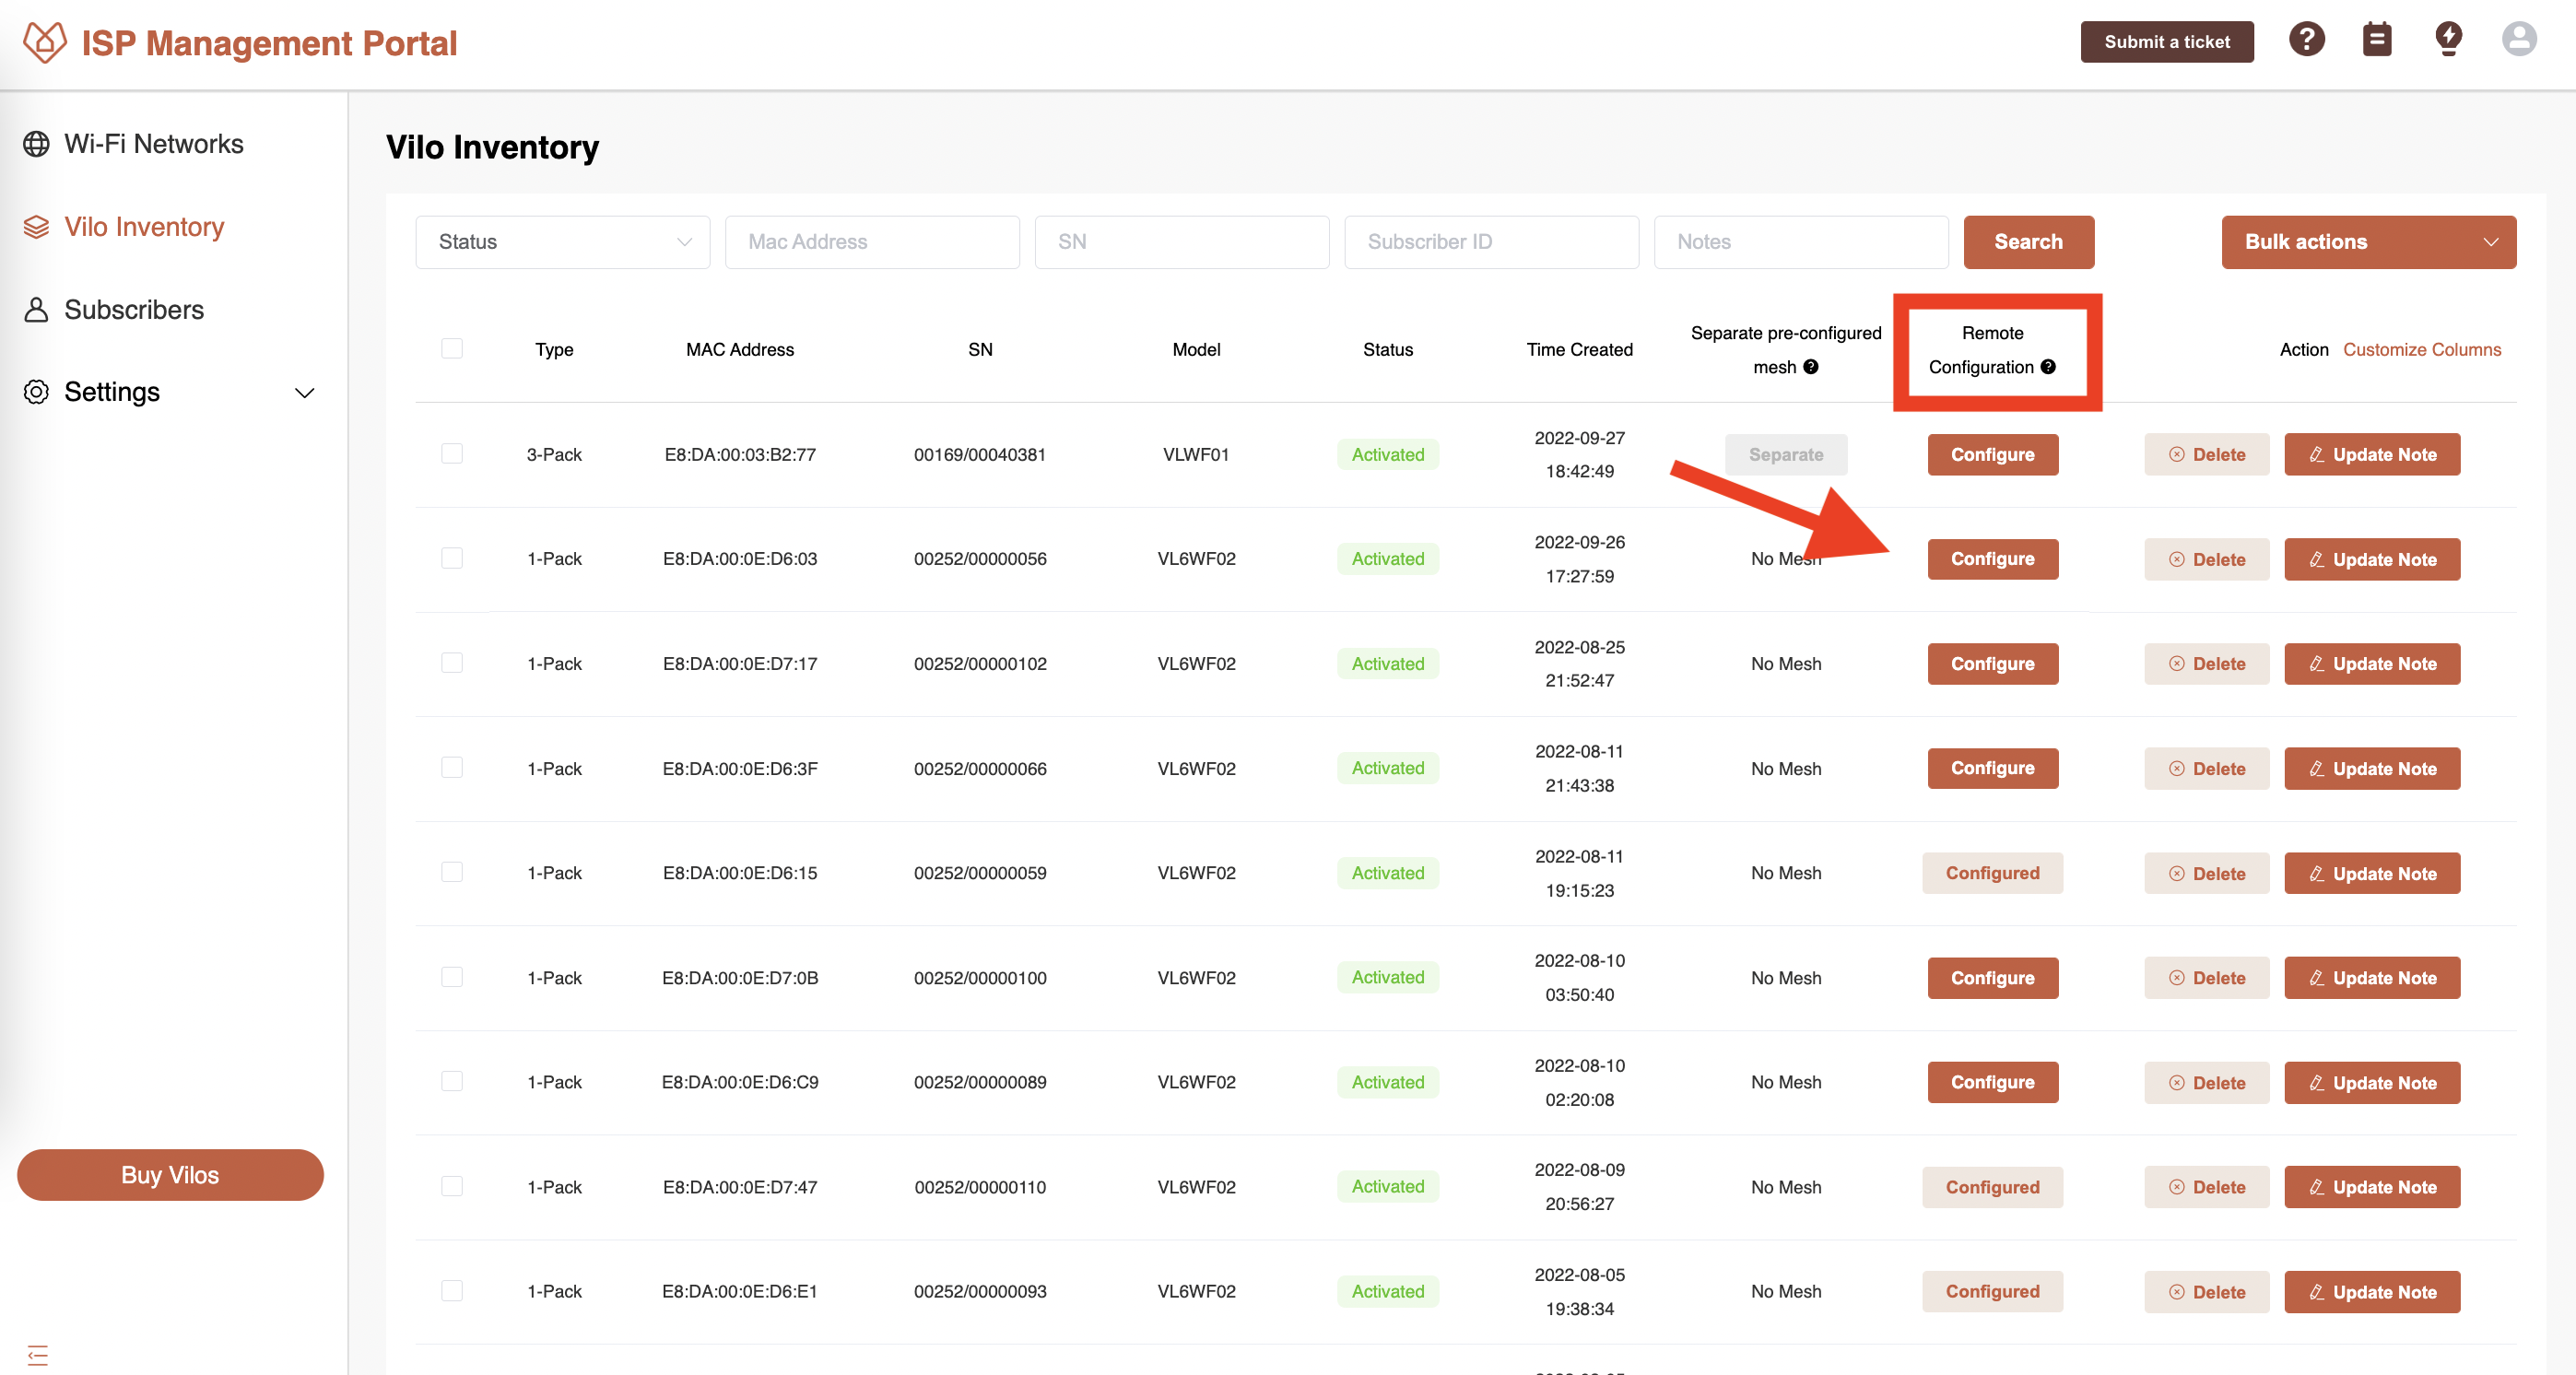
- Once the "Configure" button has been clicked, you will see the remote installation menu.
-
Enable Remote Configuration using the confirmation slider, and from here you can customize the SSID, and Password for the Vilo network or leave them set to default.
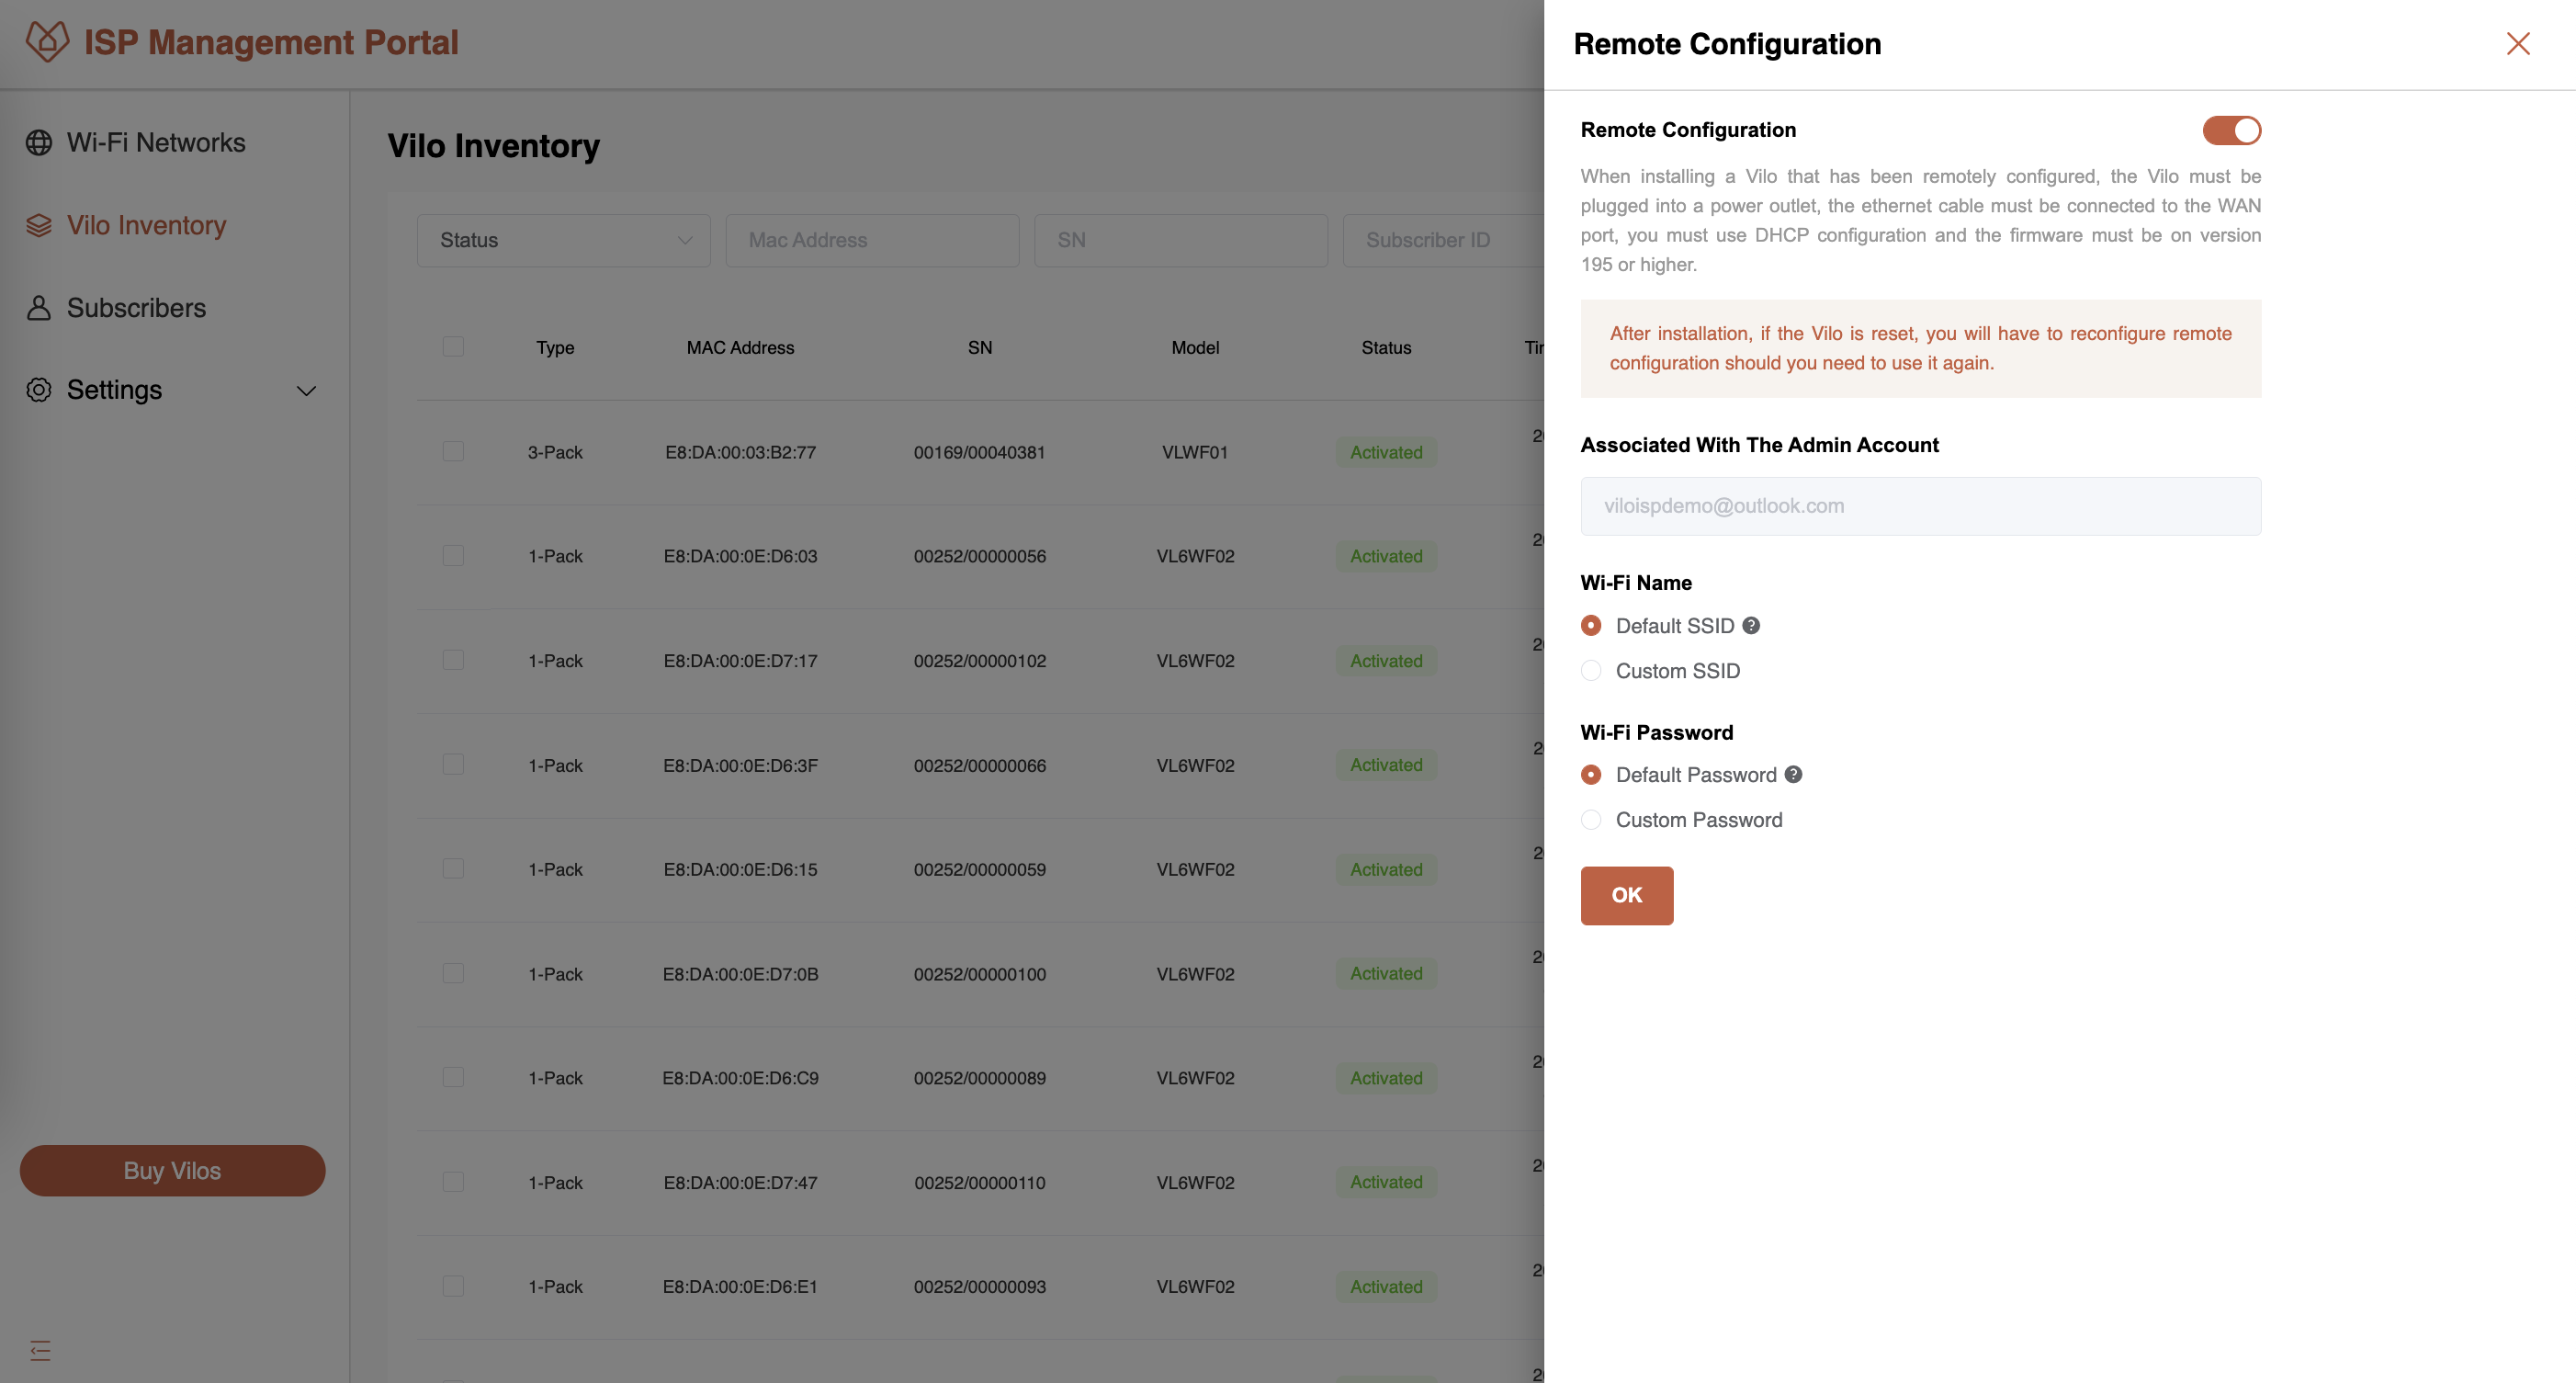
- Select OK to save changes
Please note: Remote Configuration only supports the WAN setting of DHCP.
Additional details to be aware of:
- You cannot remotely install a sub-Vilo If the pre-mesh has been removed from a 3-pack. The additional Vilos will need to be added to the network manually by selecting Add Vilo -> Add to an existing network -> From a different package
- If using a 3-pack you will need to note the MAC address of that Vilo as that is now the main unit of the 3-pack and will need to be plugged into the WAN. To avoid having to tell a customer which router should be the Main Vilo, we suggest clicking "configure" on all the 3 units. this way, the customer can pick any of the 3 to be the Main Vilo and the other 2 will still pair up via auto-meshing.
- Don't forget to inform the customer of the SSID and password that you used during configuration. If you decide to give your customers access to the Vilo App, they can check the SSID and password in the app. See instructions here on how to give your customers app access.
- Please note - Remote installation can be configured before or after installation at the customer's home. When installing Vilo at the customer's home, please ensure that the ethernet cable is connected to the WAN port, DHCP Configuration is being used, firmware is V.5.16.0.195 or higher, and the Vilo is plugged in. It will take a few mins for the configuration to be pushed and applied.
- If you want to edit network information, you can click the “Configured” button to edit the custom SSID, and password for the network.
At this time, you will not be prompted to create a Subscriber ID when setting up a network using Remote Configuration. You can still create a Subscriber ID prior to or after setting up the network to associate to a subscriber (if needed). You can learn more about how to manage subscribers here.
Comments
Article is closed for comments.